
This tutorial will guide you step by step to generate store payment references, in order to receive payments through convenience stores.
Note: You can get notifications minutes after your customer makes the payment.
Process to make store charges

- Customer completes the buying by selecting store charge as payment method
- Send a bank charge request to Openpay
- Create a payment order for your customer with the returned information
- Customer goes to store and pays for the order
- Openpay receives and validates the payment
- Openpay notifies the payment to your server
This tutorial you can see steps 2 and 3, for step 6 details please check notifications section
Create a charge (Step 2)
To receive a payment in a store you need to generate a barcode with the reference with which your customer can pay at the store.
To do this you must make a request to our API as follows:
    $openpay = Openpay::getInstance('mzdtln0bmtms6o3kck8f',
      'sk_e568c42a6c384b7ab02cd47d2e407cab');
    $chargeData = array(
        'method' => 'store',
        'amount' => 100.00,
        'description' => 'Cargo a tienda');
    $charge = $openpay->charges->create($chargeData);
Note: The maximum amount allowed for such charges is $ 9,999.99 MXN
If the request is successful you will receive an answer with the reference number generated and the barcode URL so you can create your receipt.
Response:
{
  "id" : "t6utz9dywve6zipnppys",
  "description" : "Cargo con tienda",
  "error_message" : null,
  "authorization" : null,
  "amount" : 100,
  "operation_type" : "in",
  "payment_method" : {
    "type" : "store",
    "reference" : "123456ABCDEFGHIJLKMNOPQRSTVW010000",
    "barcode_url" : "https://sandbox-api.openpay.mx/barcode/123456ABCDEFGHIJLKMNOPQRSTVW010000?width=1&height=45"
  },
  "order_id" : "oid-00052",
  "transaction_type" : "charge",
  "creation_date" : "2013-12-05T17:50:09-06:00",
  "currency" : "MXN",
  "status" : "in_progress",
  "method" : "store"
}
Sandbox: You can simulate the payment from the dashboard, so you can get a payment notification on your system via a Webhook.
Production The payment notification is done in real time, that is when your customer makes the payment at the store you will receive a Webhook and the balance in your account will be increased.
For more information see the charges reference
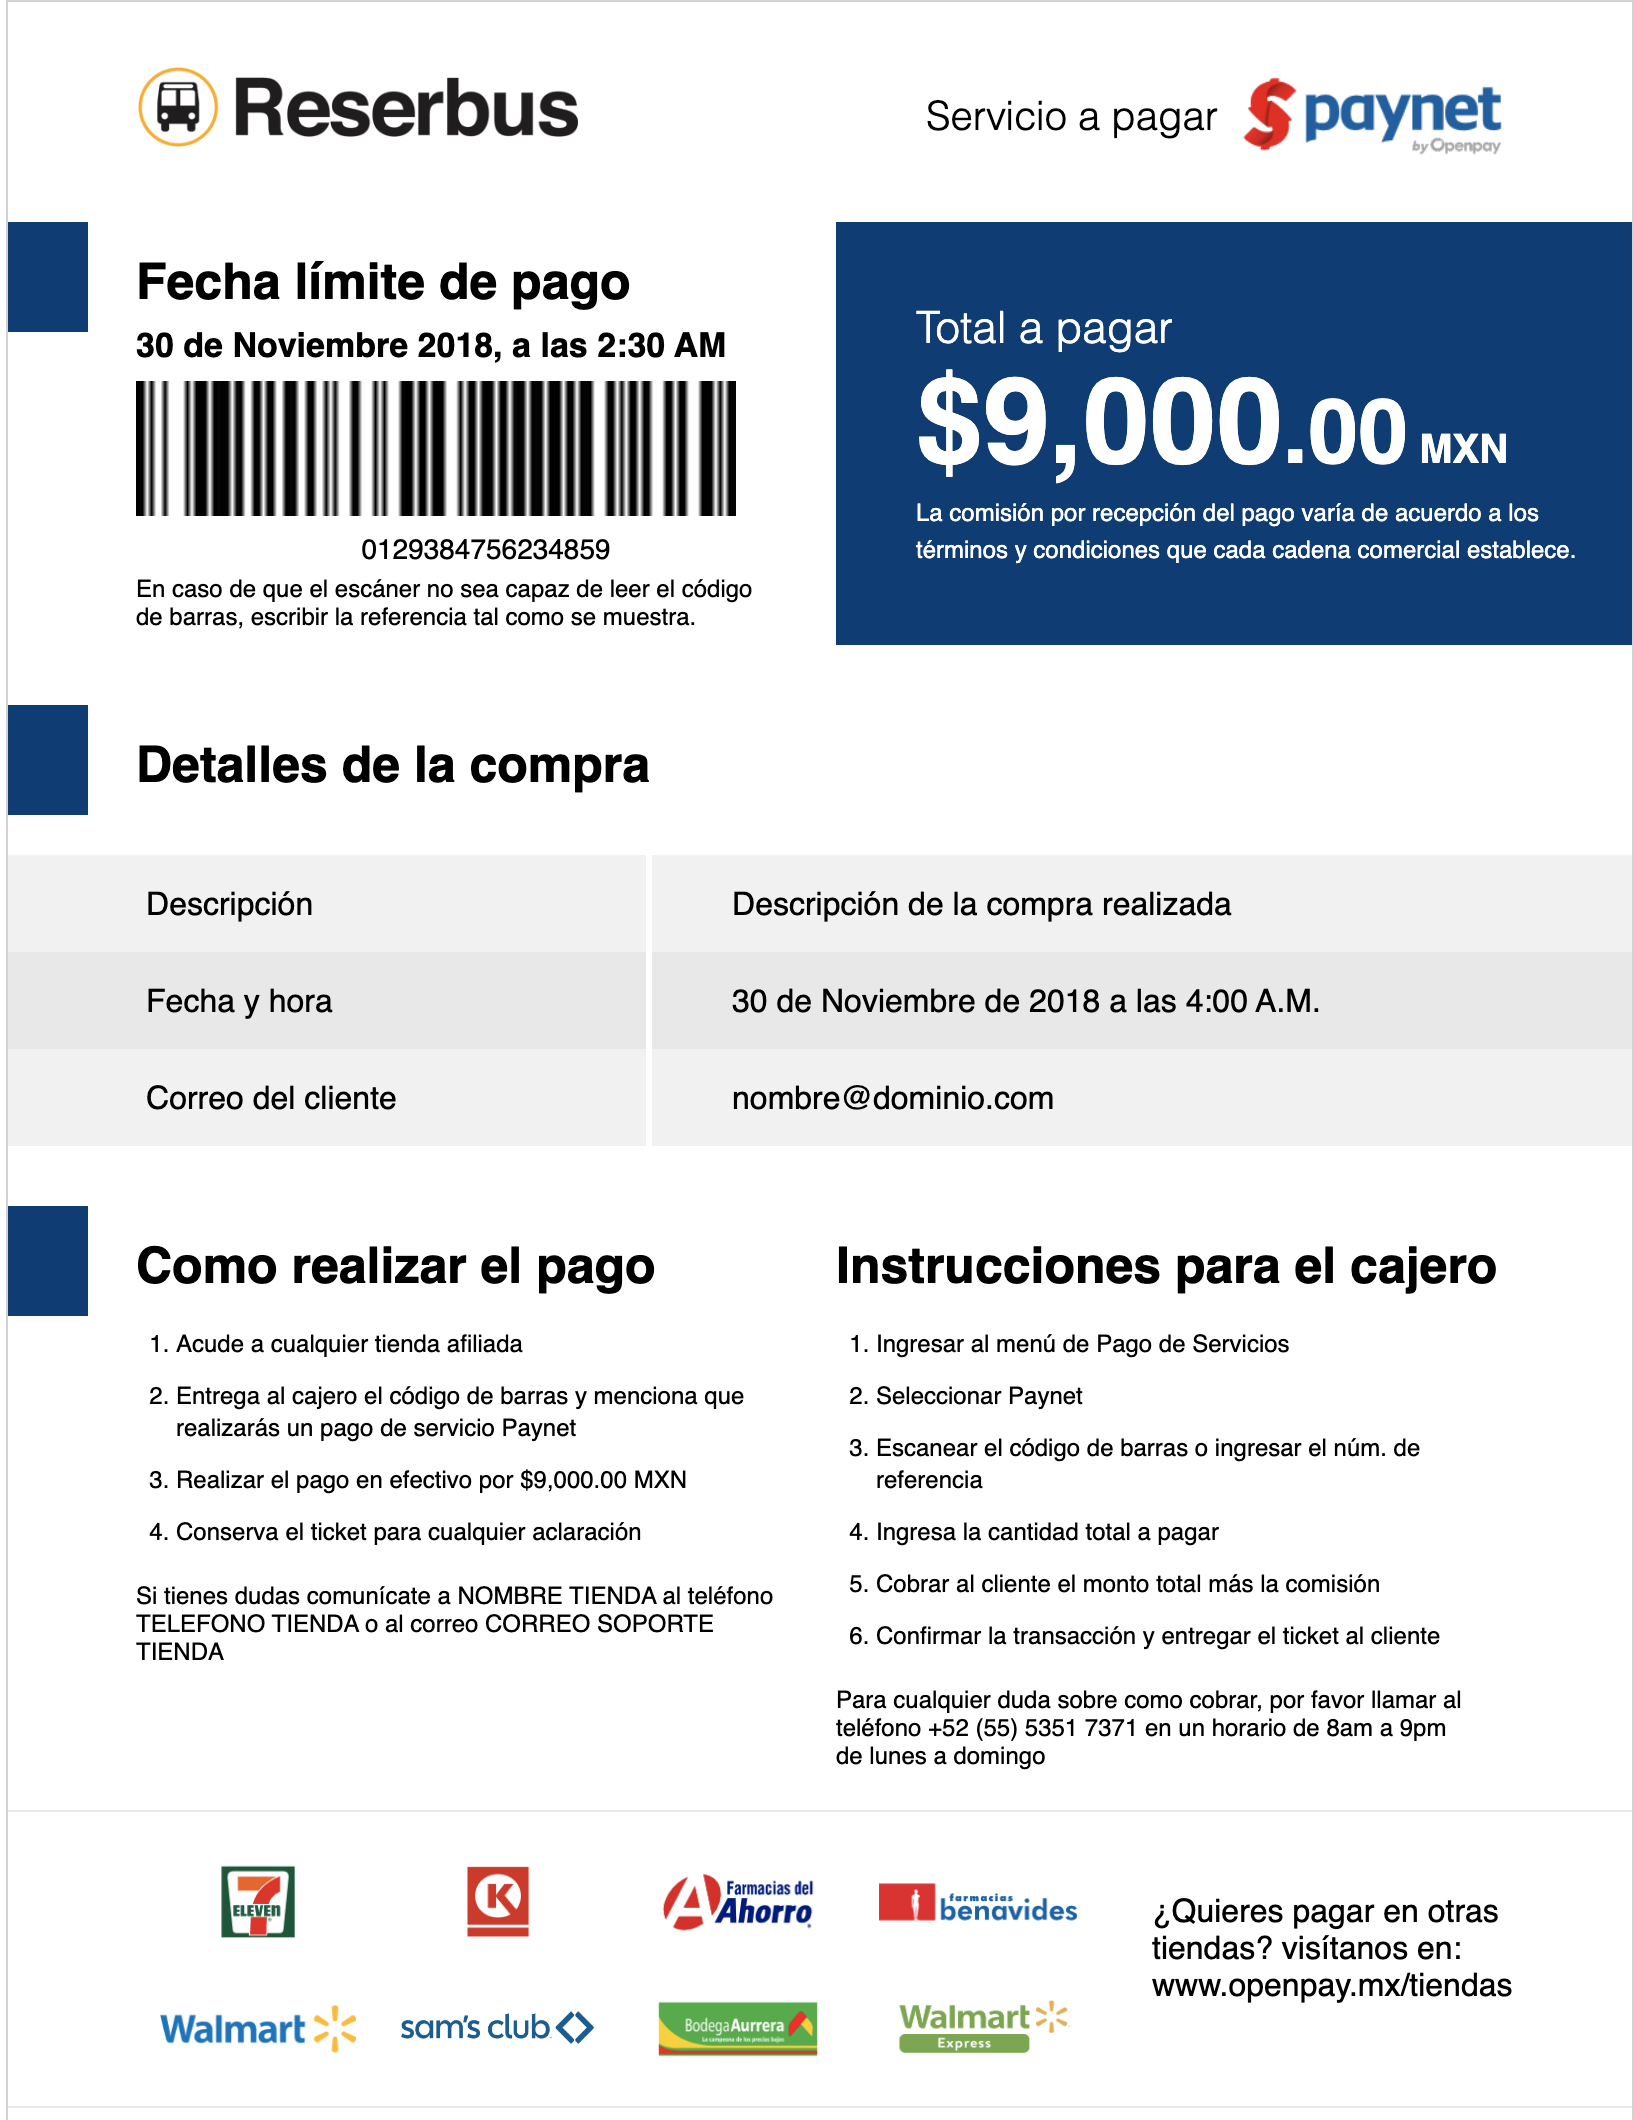
Create a payment receipt (Step 3)
Basically you can create your receipt with any design and colors, but it should include:
{DASHBOARD_PATH}/paynet-pdf/{MERCHANT_ID}/{REFERENCE}Sandbox: {DASHBOARD_PATH} = https://sandbox-dashboard.openpay.mx
Production {DASHBOARD_PATH} = https://dashboard.openpay.mx
{MERCHANT_ID} = your merchant id
{TRANSACTION_ID} = field value payment_method.reference of the transaction object returned when the charge was created
Example:
Create Custom Payment Receipt (Optional Step 3.1)
If you decide not to use the receipt offered by Openpay you can generate it yourself, basically you can create it with any design and colors, but it must include:
- Name of the service to pay
- PAYNET
- Supported chain logos
- Reference:
- Value of the
reference
- Value of the
- Barcode:
- Image of the
barcode_url
- Image of the
- Amount Due
- Value of the
amount
- Value of the
Example Custom Payment Receipt (Optional Step 3.1)
If you want to find out about how to include the map to see nearby stores, please click here
Note:
Make sure your integration meets version compatibility requirements see details *Implement Notifications to know the status of payments in real time
